在windows下面,我们可以安装配置bind9来缓存dns解析结果。避免大量的DNS查询请求,浪费网络带宽。
在日常生活中,也许我们在电脑上装了很多网络应用程序,有QQ,浏览器,网游等。他们需要连接网络,需要DNS解析服务查询ip地址。
如果我们在本机缓存DNS解析,那么他们就不用时时刻刻去查询DNS服务器,发起大量的DNS查询请求包了。
首先我们需要下载官方的bind9 for windows软件包
请访问https://www.isc.org/software/bind
下载后,推荐解压到D盘。如D:\bind
我们进入D:\bind目录,运行BINDInstall.exe进行安装
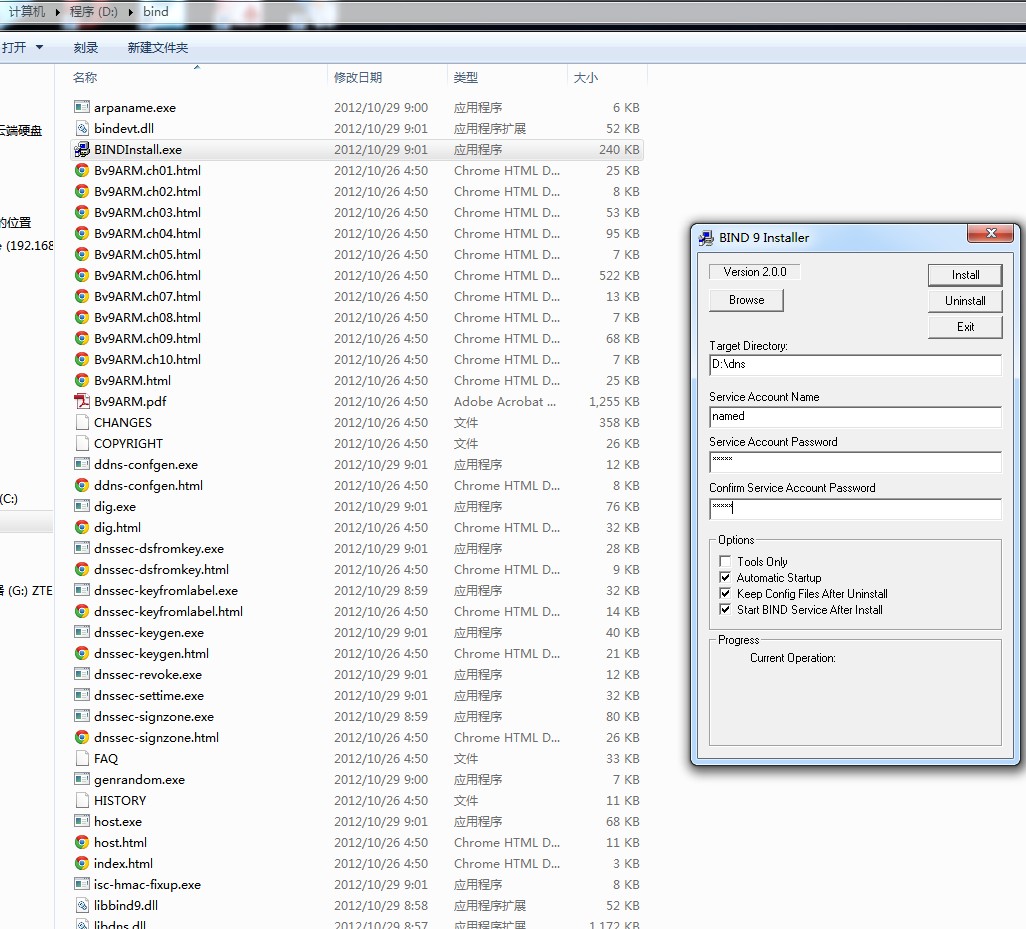
我们设置用于启动named服务的账号,密码设为bind9
然后点击安装。
以后如果要卸载,也是需要运行这个程序,不同的是,我们需要点击uninstall。
我们把bind9安装到D:\dns这个目录下面了。
接下来我们开始配置named
建立一个文件夹D:\dns\etc\namedb
新建一个文件D:\dns\etc\named.conf
options {
    // Working directory
    directory "D:\dns\etc\namedb";
    listen-on {127.0.0.1;};
    forwarders {8.8.8.8;};
    forward only;
    allow-query { 127.0.0.1; };
    allow-transfer{"none";};
    querylog yes;
};
logging{
    channel example_log{
        file "D:\dns\etc\queries.log" versions 3 size 2m;
        severity info;
        print-severity yes;
        print-time yes;
        print-category yes;
    };
    category default{
        example_log;
    };
};
// Provide a reverse mapping for the loopback
// address 127.0.0.1
zone "0.0.127.in-addr.arpa" {
    type master;
    file "D:\dns\etc\localhost.rev";
    notify no;
};
新建另外一个文件D:\dns\etc\localhost.rev
$TTL	86400 ;
; could use $ORIGIN 0.0.127.IN-ADDR.ARPA.
@       IN      SOA     localhost. root.localhost.  (
                        1997022700 ; Serial
                        3h      ; Refresh
                        15      ; Retry
                        1w      ; Expire
                        3h )    ; Minimum
        IN      NS      localhost.
1       IN      PTR     localhost.
配置完毕之后,我们用下面的命令启动named服务
net start named
如果要停止,则用net stop named
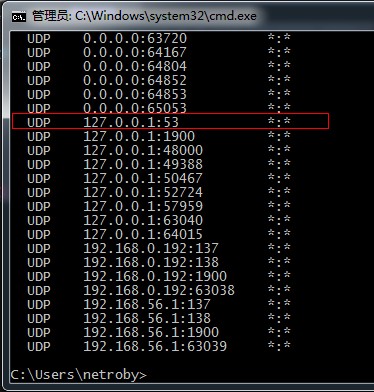
打开一个cmd窗口,WIN键+R,输入cmd即可调出cmd窗口。
netstat -na -p udp
查看下有没有127.0.0.1:53这样的监听端口。
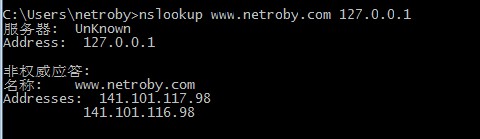
接下来,我们测试下DNS解析
现在我们可以改网卡的配置文件,设置DNS为127.0.0.1
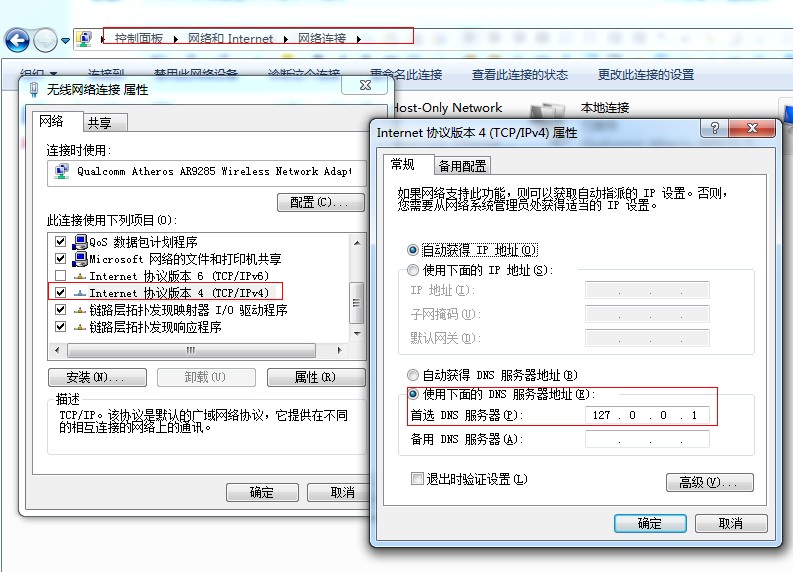
现在
转自:https://www.netroby.com/view.php?id=3538